Principles, material selection, application, and pitfalls — all in one place
Tile Refinishing · Waterborne Coatings · Application Technique
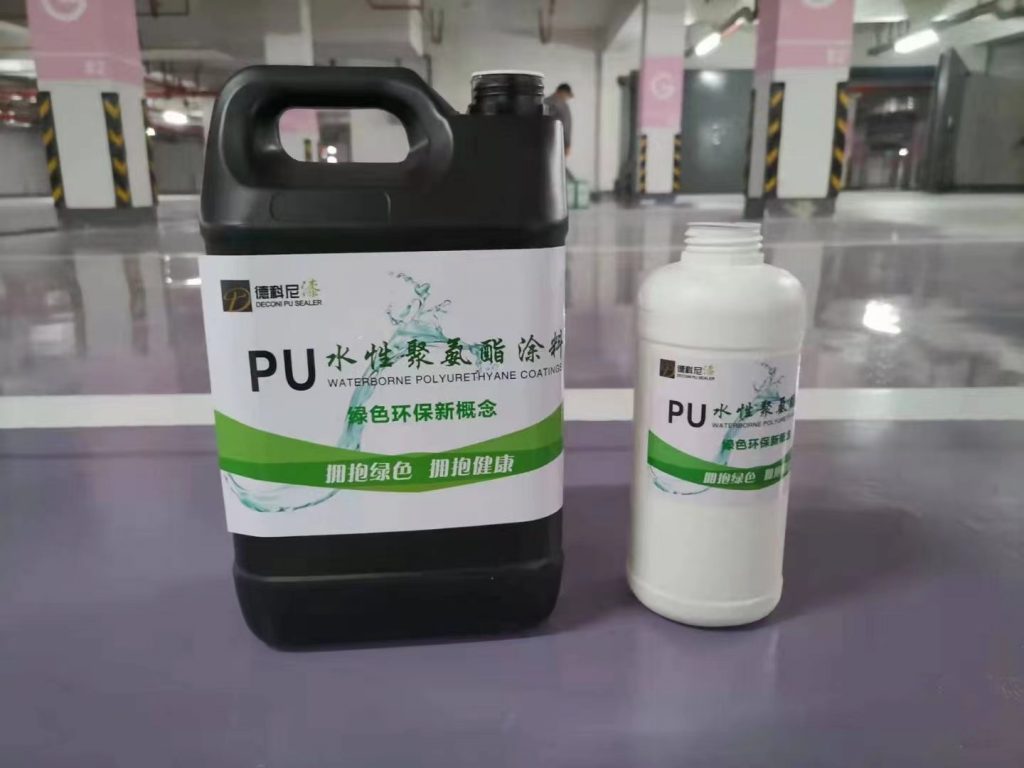
| The most expensive line item in a renovation is often not the materials — it’s the demolition. Breaking out tiles, hauling away debris, re-leveling the surface, redoing waterproofing, then laying new tiles — the whole process takes at least two weeks, costs a fortune, and disturbs everyone around you. In many cases, though, you don’t actually have to tear anything out: painting waterborne polyurethane coating over the tile surface is currently one of the most cost-effective ways to refresh old tiles. This article pulls together my hands-on experience from renovating two apartments — from the underlying principles and material selection to the actual application and the pitfalls to avoid, all in one place. |
Contents
1. First Things First: Why Waterborne Polyurethane?
2. Not Every Tile Is a Candidate
3. Materials List
4. The Six-Step Application Process
5. Quick Answers to Common Questions
6. A Few Real Pitfalls I’ve Already Stepped In For You
7. Let’s Do the Math
Final Thoughts
1. First Things First: Why Waterborne Polyurethane?
There are roughly three categories of tile-refinishing coatings on the market. Here’s a side-by-side comparison.
| Type | Adhesion | Wear/Water Resistance | Odor & Eco-Friendliness | Best Suited For |
| Epoxy resin paint | Very good | Good, but prone to yellowing | Strong odor, usually two-component | Bathroom and balcony floors |
| Tile-specific primer + topcoat | Fair | Fair | Good | Rental units, ultra-low budgets |
| Waterborne polyurethane paint | Very good | Good — resists yellowing and scratches | Low VOC, water-based, virtually odorless | Kitchens, bathrooms, living room floors, walls |
The core advantages of waterborne polyurethane come down to three things:
- Strong adhesion. The polar groups along the polyurethane molecular chain can grip the silicate structure of the tile surface. Combined with a dedicated bonding agent, it won’t peel off in large sheets if done correctly.
- Tough, flexible film. It isn’t a hard, rigid shell — it has some elasticity, so it moves with the tile as it expands and contracts with temperature, making it less likely to crack.
- Water-based and eco-friendly. With water as the dispersion medium, its VOC content is far lower than oil-based paints. For homes with elderly people or young children, or apartments that can’t sit empty for long, this point is critical.
In one sentence: for eco-friendliness, flexibility, and durability, go waterborne polyurethane.
2. Not Every Tile Is a Candidate
Start with a “qualification check” so you don’t waste your effort.
(1) Cases that work well
- Glazed, polished, and rustic tiles with low water absorption
- Firmly bonded tiles with no hollow spots or looseness
- When you want to quickly change color or texture (e.g., turning dated terrazzo tones into a matte creamy white)
- Rental property refreshes and quick touch-ups on pre-owned homes
(2) Cases where painting is not advised
- Walls with extensive hollow spots or loose tiles (fix the structure first, then talk about painting)
- Permanently wet areas where the original waterproofing layer has failed (waterproofing must be redone first)
- Surfaces that are already severely sandy or powdery
- Industrial settings where floors take heavy loads or forklifts drive over them
A low-tech way to check for hollow spots: Tap each tile with a key or a small wooden stick. A “dull” sound means solid; a “crisp” sound means hollow. If a hollow area exceeds one-third of a single tile, it needs to be addressed.
3. Materials List (Based on a 6 m² Kitchen Wall and Floor)
| Material | Reference Quantity | Notes |
| Waterborne polyurethane tile paint (topcoat) | 2–3 kg | One primer coat plus two topcoats; calculate by each brand’s coverage rate |
| Dedicated tile bonding agent / adhesion promoter | 0.5–1 kg | Do not skip this step — it determines success or failure |
| Waterborne tile primer | 1–2 kg | Seals the substrate and improves grip |
| Fine sandpaper (240–400 grit) | As needed | For sanding and creating a roughened surface |
| Masking tape, protective film, drop cloths | As needed | For masking and protection |
| Short-nap roller + wool brush + paint tray | 1 set | Rollers for flat surfaces, brushes for edges and corners |
| Anti-mold grout (optional) | — | Makes the result look more seamless after joint treatment |
A rule of thumb for quantities: Waterborne tile paint generally covers about 8–10 m² per kg per coat. For two topcoats plus one primer coat, buying 2–3 kg for a 6 m² area is fairly safe. Buy a bit extra — you’ll need it for touch-ups.
4. The Six-Step Application Process (This Is the Most Important Part)
STEP 1
Clean and Degrease
This is the root cause of 80% of failed refreshes.
- Use a cleaner to thoroughly remove grease, soap scum, and mold. Kitchen walls must be degreased — use a degreaser or baking soda with a heavy-duty grease cleaner.
- Bathrooms need limescale and soap scum removed, with a descaler if necessary.
- Rinse with clean water and let it dry completely. Moisture is the killer of adhesion.
Remember: paint doesn’t stick to tile — it sticks to a clean, dry tile surface.
STEP 2
Sand and Roughen
- Sand the entire tile surface with 240–400 grit paper until it loses its gloss.
- The goal isn’t to thin the tile — it’s to create a micro-rough surface for the paint to grip.
- After sanding, remove all dust thoroughly, wipe with a damp cloth, and let it dry.
For very smooth glazed tiles, this step should absolutely not be skipped.
STEP 3
Treat the Grout Lines
- For powdery or blackened old grout, scrape out 1–2 mm first.
- Fill and level with anti-mold grout or waterborne putty.
- When the joints are properly treated, the finished surface looks like one continuous piece instead of “obviously an old tile.”
STEP 4
Apply the Bonding Agent / Adhesion Promoter
- Roll or spray it on according to the instructions — thin and even.
- Wait until it’s dry to the touch (typically 2–4 hours, per the product instructions — don’t guess).
- This layer is the “bridge” that connects the tile to the primer. Skip it, and don’t blame the paint when it peels later.
STEP 5
Apply Primer + Two Topcoats
- One primer coat: Seals the substrate and evens out absorption. Apply thin, with the roller moving in a crosshatch pattern.
- First topcoat: Follow the dilution ratio exactly as instructed (usually 5%–10%). Don’t add more on your own — too much water drops the film’s strength a whole grade.
- After it’s dry to the touch (usually 2–4 hours), lightly sand to remove any bumps and dust it off.
- Second topcoat: This is the crucial film-forming coat. Keep the roller direction consistent and the thickness even.
- Touch up edges, corners, and grout lines with a wool brush — don’t leave any missed spots.
Every coat follows the same principle: thin coats, multiple passes, beat one thick coat. Thick coats cause sagging, incomplete curing, and wrinkling later on.
STEP 6
Curing
- Dry to the touch in about 2–4 hours; light foot traffic after about 24 hours.
- Full curing takes about 7 days. During this period, avoid heavy loads, standing water, and scratching with hard objects.
- For floor refreshes, don’t move furniture or drag heavy objects during the curing period.
- For bathrooms, wait 7 days before showering normally.
5. Quick Answers to Common Questions
| Question | Answer |
| How soon can it get wet? | Surface dryness isn’t curing. Floors can take light foot traffic after 24 hours, but avoid standing water for 7 days; bathroom walls can get a little water after 48 hours and be used normally after 7 days. |
| Will the paint peel? | Not if the process is done right. Nine out of ten peeling cases come down to three causes: no degreasing, no sanding, no bonding agent. Get these three steps right, and it’ll last 5+ years in normal use. |
| What finishes can I get? | Matte, semi-matte, and gloss are all available. For a premium look, matte or semi-matte is recommended — gloss tends to expose flaws in the substrate. Dark colors cover better than light ones; if you’re painting light over dark tiles, add an extra primer coat. |
| How do I handle the grout lines? | For a “seamless, unified” look, grout first and then paint the whole surface. To keep the tile-joint texture, paint first and then grout with a matching color. |
| Can I paint over old paint? | Yes, but confirm the old paint is firmly bonded and not powdery. Sand, dust off, then apply. |
| Is the odor strong? How soon can I live there? | Water-based systems are essentially free of irritating odor. With ventilation, you can typically return to normal use the same day — this is also its biggest advantage over oil-based paint. |
6. A Few Real Pitfalls I’ve Already Stepped In For You
- Skipping the bonding agent — saving a few dozen yuan, only to have the wall peel like a snake shedding its skin two months later. The rework cost is ten times more.
- Over-diluting with water — adding more just because it’s easier to roll makes the film as soft as paper, denting at the slightest touch.
- Applying thick on the first coat — sagging, uneven drying, and later cracking all come from this.
- Applying the next coat before it’s dry — dry outside, wet inside, and it blisters six months later.
- Using the wrong roller — a long-nap roller leaves texture; short- or medium-nap gives a smooth finish.
- Ignoring temperature and humidity — don’t apply below 5°C or above 85% humidity, or film formation will fail.
7. Let’s Do the Math
Take a 6 m² kitchen wall as an example:
| Option | Materials | Labor | Timeline | Disruptive? |
| Tear out and re-tile | 800–1,500 yuan | 800–1,500 yuan | 7–14 days | Yes, very noisy |
| Waterborne polyurethane refresh | 200–400 yuan | DIY-able | 2–3 days | No |
No tearing out tiles, no hauling debris, no need to hire a contractor — and you can choose the color and texture you like. For budget-conscious refreshes that need fast results, few things beat the value of this one can of paint.
Final Thoughts
The essence of tile refinishing isn’t “rolling on a coat of paint to cover up the ugly parts” — it’s rebuilding a firmly bonded, durable, and attractive new finish on the tile surface.
So the core message of this whole article comes down to one line:
Substrate preparation determines success or failure; application technique determines lifespan.
Clean, sand, bonding agent — get these three steps right, and waterborne polyurethane paint will reward you with stable performance for five years or more. Cut corners on these three, and no amount of expensive paint will save you.
If you’re about to refresh an old kitchen or bathroom, start by tapping the tiles to check for hollow spots. If the tiles are solid, you have every chance to trade a few hundred yuan and two weekends for a brand-new home.
Note: The quantities and times in this article are general rules of thumb. Refer to the instructions of the specific product you purchase.
Leave a Reply